
I wanted to add oil pressure and a boost gauge to my car. Of course there aren't a lot of places to mount gauges in the car but I recalled Fred Kern had put two gauges in his center console and it looked great. I E-mailed him about it and he offered to build me a panel with a bit of a twist. Instead of just putting the two gauges to the side of the OBC like he did on his car he wanted to center the OBC and put a gauge on each side. He thought it would look better balanced.
To remove that panel the entire center console must be removed. This is a project in itself. Of course the oil pressure sender must be wired in place. See Ron's site for great install instructions.
I did this in the middle of my supercharger install to have MUCH easier access to the sender. Adding the gauges meant I had to relocate all my switches. The AC switch I moved to the blank to the side of the steering wheel. I had to gently sand down the plastic cover that was already there to fit the AC switch in but it did fit well after that.
For the heated seat switches I moved them to the rear switch location on the center console. To do this I had to splice in extra wires (12 of them) for the wiring to reach. While I had everything apart I also added the Auto-Loc one touch windows. I don't have a power top or ASC so I didn't need to deal with those switches.
I also did Ron's Audio Oil Alert mod during all this. For that mod I also added another Radio Shack buzzer to increase the volume and added a LED above the oil pressure gauge as another idiot light. The wiring for these extras is very simple. You just feed a switched 12v to both the LED and the additional buzzer and tie both of their grounds to T4 on the chime module.
Getting the center console back together is not fun but the end result was fantastic.

For a better match with the factory illumination you need to purchase orange 'condoms' for the VDO bulbs. These are available here. Purchase a few extra as they are very difficult to fit over the bulbs. Another option is to get 'Stained Glass Window Paint' at a craft store and paint the bulbs as desired. You supposedly can get a very good match doing this.
On my gauges I doubled up on the condoms and the match is pretty close.
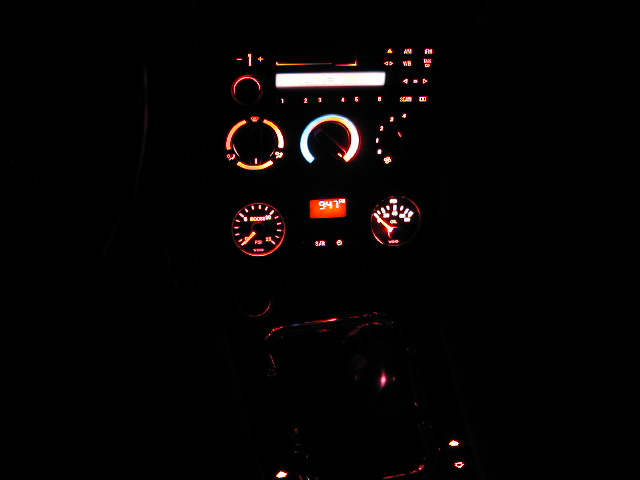
In the above picture the boost gauge looks redder then the oil pressure but in real life they are the same. Be sure to try the lighting before you install the panel back in the car. I was getting light 'leaking' around the edge of the gauges and the panel and it looked bad. It just took a little electrical tape wrapped around the back side of the gauges to stop this. They look factory now.
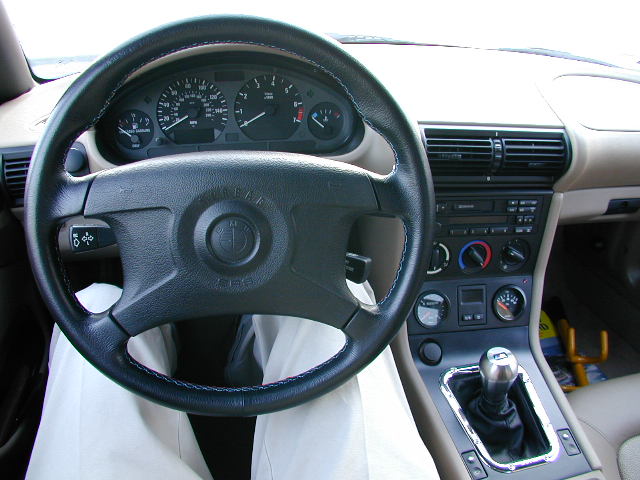
From the drivers seat:
_________________________________________________________________________
Another option for installing a gauge is using an A-Pillar mount. An owner of a 2.8l Coupe took me up on my garage invite to help him install an oil pressure gauge in his car. This was MUCH easier. The most difficult part was just installing the sender. We had to pull his airbox out to get at it but that comes out very easily. For all the electrical hookup we used the headlight switch wiring that had everything we needed and was very close by.
For the gauge holder we were able to peel back the foam covering (only on the Coupes) of the A-Pillar and install most of the mount under that. It helped give it a more seamless look.
Be careful if you take this approach when gluing the fabric onto the mount. A little too much was used and it bled through the fabric as seen here.
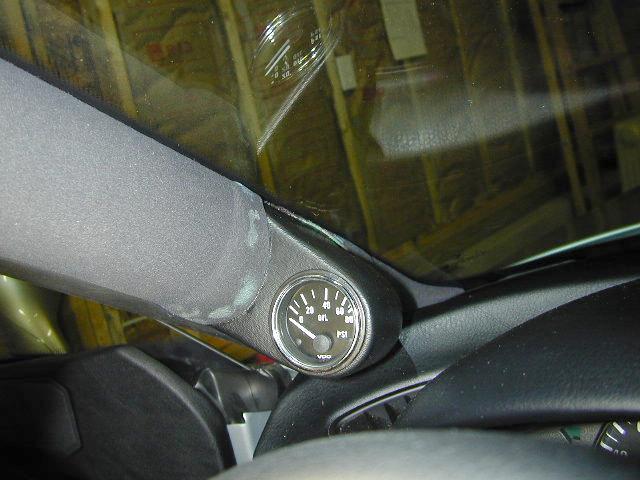
However everything turned out fine. The glue dried clear then the owner touched up the fabric with a little 'Goof Off' to get rid of the hard spots in the fabric. The end result is below.
